
When your RV air conditioner decides to take an unscheduled break on a sweltering day, it’s easy to assume the worst—and a big repair bill. But before you start sweating, remember that effective rv air conditioner troubleshooting almost always begins with the simple stuff. Checking the power, thermostat, and filters can solve a surprising number of AC headaches in just a few minutes. Having basics like a quality RV surge protector and spare filters on hand makes those first checks even easier.
Your First Checks for a Faulty RV Air Conditioner
We’ve all been there: that sinking feeling when the cool, refreshing air suddenly stops. It’s a classic RV frustration. But before you start pulling off panels or dialing up a mobile tech, just take a breath. More often than not, the problem isn’t some catastrophic failure but a simple oversight you can fix yourself.
Walking through these initial checks methodically helps you quickly rule out the most common culprits. This approach will save you time, stress, and potentially a few hundred dollars.
This little diagram lays out the logical first steps perfectly, starting with the power source and working your way through the thermostat and filter.
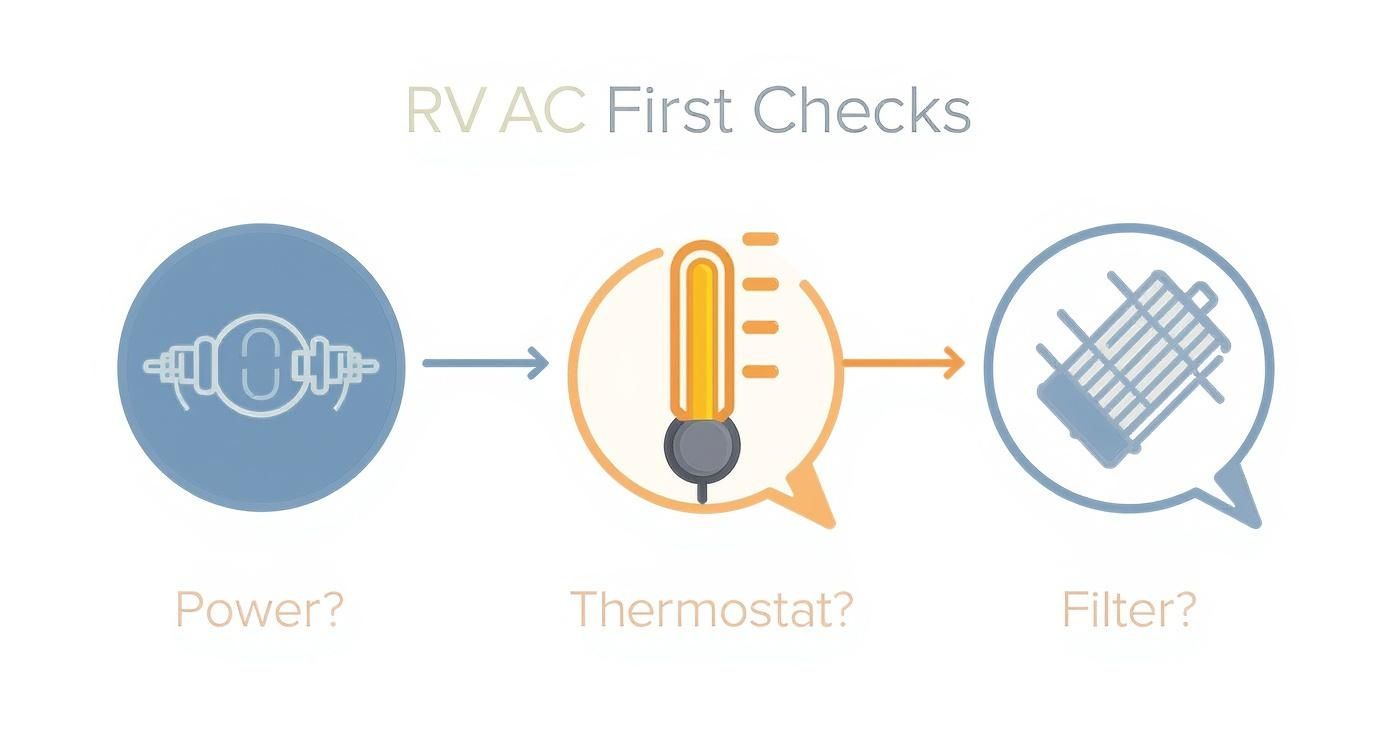
Following a systematic path like this ensures you don’t miss an easy fix while chasing a more complicated (and expensive) phantom problem.
Before you start taking things apart, run through this quick checklist. I’ve put together a simple table to guide you through the initial diagnostics—it covers the most common issues I’ve seen over the years.
Initial Diagnostic Checklist
| Check | What to Look For | Quick Fix |
|---|---|---|
| Power Pedestal | Is the breaker on? Is the voltage stable (check your surge protector)? | Flip the breaker. If voltage is low, the park’s grid may be overloaded. A plug-in RV surge protector/EMS will tell you instantly. |
| RV Breaker Panel | Has the “AC” breaker tripped? | Reset it once. If it trips again, you have a bigger electrical issue. |
| Thermostat Mode | Is it set to “Cool” and the fan to “Auto”? | Adjust settings. Sometimes it’s just set to “Fan Only” by mistake. |
| Thermostat Temp | Is the set temperature well below the current room temperature? | Set the temperature at least 10 degrees lower to force the compressor on. |
| Thermostat Batteries | Does your digital thermostat have power? | Replace the batteries if the screen is dim, blank, or showing a low-battery icon. If the stat is aging or finicky, consider upgrading to a new RV thermostat. |
| Air Filter | Is the filter dirty, dusty, or clogged with debris? | Clean or replace the filter. A clogged filter is a top cause of poor cooling. Keep a couple of spare RV AC return-air filters in a cabinet. |
These simple checks solve the majority of “my AC won’t work” calls. If you’ve gone through all of them and are still stuck, then it’s time to dig a little deeper.
Confirm Your Power Source
An RV air conditioner is a power-hungry beast. It needs a solid 120V AC connection to run, which means you either need to be plugged into shore power or have a beefy enough generator running.
Start at the source: the campground pedestal. Make sure the breaker is flipped on. This is where a quality surge protector is worth its weight in gold—it will tell you if the voltage is dipping too low, a frequent problem in crowded campgrounds on hot days. Low voltage will stop your AC’s compressor from ever starting up. If you don’t already have one, a portable RV EMS/surge protector is a smart investment.
Next, head inside your rig to the main breaker panel. Find the breaker labeled “AC” or “Air Conditioner” and confirm it hasn’t tripped. If it has, flip it back on. If it immediately trips again, stop. That’s a sign of a more serious electrical fault that needs a closer look.
Check the Thermostat Settings
I know, it sounds almost too obvious, but you’d be surprised how often the thermostat is the culprit. We’ve all done it. First, make sure it’s actually set to “Cool” and the fan is on “Auto.”
A key troubleshooting tip I always give people is to set the desired temperature at least 10 degrees below the current interior temperature. This gives the system a clear, undeniable command to fire up the compressor, not just the fan.
Also, don’t forget to check if your thermostat runs on batteries. Many digital models do, and a pair of dead batteries will render your AC completely unresponsive, even if your rig has full power.
Inspect the Air Filter
A clogged air filter is the number one enemy of any RV air conditioner, hands down. It chokes off the airflow across the evaporator coils, which tanks the unit’s cooling power and can even cause it to freeze into a solid block of ice.
It’s a huge blind spot for many owners. A 2022 survey found that 54% of RVers who complained about weak cooling hadn’t cleaned their filters in the last 3–6 months. You can read more about how routine maintenance prevents common AC issues over at Lippert.com. If your existing filters are falling apart, upgrade to reusable or OEM-style replacement RV AC filters.
What to Do When Your RV AC Refuses to Turn On
So, you’ve already checked that you have good power coming into the rig and fiddled with the thermostat, but the AC is still completely dead. No clicks, no hums, nothing. This is where we have to dig a little deeper than just flipping a switch and start tracing the power from its source to the rooftop unit.
When an AC unit gives you the silent treatment, the culprit is usually lurking in your RV’s main electrical system or a key startup component has given up the ghost. Let’s walk through the most common reasons this happens so you can track down the problem.
Check Your Transfer Switch and Converter
Before you break out the ladder and climb on the roof, there are two important players inside your rig worth checking first: the automatic transfer switch and the converter.
Your transfer switch is the gadget that decides whether your RV runs on shore power or your generator. If this switch goes bad or has a loose wire, it can completely block 120V power from reaching your AC, even if the campground pedestal is working perfectly. A good sign it’s working is a solid “clunk” sound when you plug in or fire up the generator. If you hear silence, that’s a red flag.
The converter’s main job is charging your 12V batteries, but it’s all tied into the same electrical ecosystem. A failing converter can cause all sorts of weird electrical gremlins, and while it’s less likely to be the direct cause, a quick visual check for any burnt wires or loose connections is always a smart move. If yours is original and suspect, it might be time to look at a modern RV power converter/charger.
The usual suspect: A Failed Start Capacitor
If all the power inside the RV seems fine but the rooftop unit is still a brick, it’s time to head up top. From my experience, one of the most common reasons an AC compressor won’t start is a failed start capacitor. This little can-shaped part is responsible for giving the compressor and fan motors the powerful jolt of energy they need to get going.
Think of it like a tiny battery that delivers one big punch. Without that initial kick, the motors just can’t overcome their own inertia. They’ll either sit there silently or maybe let out a faint hum.
Don’t just take my word for it—industry repair data shows that bad capacitors are behind a huge number of AC service calls. A 2023 analysis from RV service pros found that a whopping 28% of all units brought in for a “no-start” or “no-cool” complaint had a failed capacitor. These things are workhorses, and the constant vibration and high heat on an RV roof eventually take their toll. You can get a great deep dive into these stats from seasoned technicians.
Pro Tip: A classic sign of a bad capacitor is a loud humming or buzzing from the rooftop unit right when the AC is supposed to kick on. A few seconds later, you’ll hear the breaker trip. That’s the sound of the motor trying—and failing—to start without its electrical kickstart. Keeping a spare RV AC start/run capacitor in your parts bin isn’t a bad idea.
How to Safely Inspect and Test a Capacitor
Safety First: Before you touch anything, you absolutely must kill all power to your RV. Unplug from the pedestal, shut down the generator, and flip your main battery disconnect switch. Capacitors can hold a dangerous electrical charge long after the power is off.
Once you’re safely on the roof, you’ll need to remove the big plastic AC shroud. The capacitor is usually tucked away near the compressor, often under a small metal cover. Here’s what to look for:
- Bulging or Swelling: The top of the capacitor should be perfectly flat. If it looks domed or swollen like a puffed-up can, it’s toast.
- Leaking Fluid: Any oily residue on the casing is a dead giveaway that it has failed.
- Corrosion: Check the terminals for any rust or gunk that might be preventing a good connection.

If it looks fine visually, you’ll need a multimeter that can test capacitance (look for the µF or MFD setting). First, carefully discharge the capacitor by touching the two terminals simultaneously with the metal shaft of an insulated screwdriver. Then, disconnect the wires and test across the terminals with your multimeter probes. The reading should be within +/- 10% of the rating printed on the side of the capacitor. If it’s way off or reads zero, you’ve found your problem.
The good news is that replacing a capacitor is a cheap and easy DIY fix that can bring your AC back to life in minutes and save you a hefty bill from the mobile tech. Just match the specs and order a replacement from the RV AC capacitors section.
Solving Weak Airflow and Poor Cooling Performance
You know the feeling. The AC is running, but it feels like a glorified fan just pushing stale, warm air around. This is hands-down one of the most common complaints I hear, but the good news is, it rarely means your expensive AC unit is toast.
More often than not, it’s just an airflow problem. That’s something you can usually fix yourself with a little time up on the roof.
Before you start worrying about complex stuff like refrigerant leaks, your first move should always be to check for blockages. In my experience, this is the root cause of weak cooling performance the vast majority of the time. Let’s head up top and get our hands dirty.
Tackling Dirty Coils: The Primary Cooling Killers
Your RV air conditioner has two sets of coils that work as a team: the evaporator coil inside and the condenser coil outside. Think of them as the lungs of your AC unit. Over time, they get absolutely caked with dust, road grime, cottonwood fluff, and whatever else the road throws at them.
This buildup severely restricts airflow and cripples their ability to transfer heat. A dirty coil isn’t a minor issue—it can slash your cooling efficiency by as much as 50%.
To get to them, you’ll need to climb onto the roof and take off that big plastic AC shroud. Safety first: always kill all power to the RV at the breaker before you start poking around.
- Evaporator Coils: You’ll find these on the “cold” side of the unit, where air from inside your RV gets pulled in. They can be a bit trickier to access, often hidden behind a metal cover plate you’ll need to remove.
- Condenser Coils: These are on the “hot” side, usually facing the rear of the AC. They’re typically more exposed and easier to get to.
I start by using a soft-bristle brush and a vacuum to gently clear away all the loose gunk. For the really stubborn, caked-on grime, a can of non-corrosive, foaming coil cleaner works wonders. Just spray it on, let it foam up for 10-15 minutes, then gently rinse it away with a spray bottle of water. Be careful not to let the runoff pool up on your roof. You can find suitable products in most auto aisles or in our coil and fin cleaner section.
The Mystery of a Frozen Evaporator Coil
Ever look up at your AC and see water dripping inside or ice forming on the filter? That’s a classic sign of a frozen evaporator coil. This happens when the airflow is so bad that the condensation on the coils freezes into a solid block of ice instead of draining off like it’s supposed to.
Once that ice block forms, it completely chokes off any remaining airflow. The result? Your AC blows warm air, or sometimes no air at all. The number one cause is a dirty air filter inside your rig, which you should have already checked. If the filter is clean, dirty coils are the next culprit.
The fix is simple but requires patience. Turn the AC mode off completely, but leave the fan running on high. This circulates room-temperature air across the coils and helps them thaw out. Depending on how badly it’s iced up, this can take anywhere from 30 minutes to a few hours. Whatever you do, resist the urge to chip at the ice—you’ll damage the delicate aluminum fins in a heartbeat.
Inspecting Fans and Ductwork for Blockages
While coils are the usual suspect, don’t forget about the parts that actually move the air. With the shroud still off, give the blower fan and the condenser fan a good look. I’ve found everything from leaves and twigs to old wasp nests caught in the blades, completely messing up the airflow.
Finally, take a peek at your RV’s ductwork, especially if you have a ducted system. Over time, those flexible ducts in the ceiling can get crushed, disconnected, or even torn.
Grab a flashlight and peer into your ceiling vents. If you can pop a vent cover off, check that the connections are secure and the duct itself isn’t blocked. I’ve fixed many cooling issues with a simple piece of HVAC foil tape to seal up a leaky connection that was dumping all that precious cold air into the roof cavity. A small roll of foil duct tape is worth having on board.
Decoding Strange Noises and Annoying Leaks
Your RV air conditioner is always talking to you. The steady, quiet hum of cold air is exactly what you want to hear, but any sudden rattles, squeals, or clunks are your AC’s way of telling you something is wrong. You shouldn’t ignore those signals.
Likewise, finding a puddle of water inside your rig is a clear sign that something needs immediate attention. Learning to interpret these sounds and drips is a huge part of good rv air conditioner troubleshooting. Tackling them early is key—a strange noise could be a loose bolt today and a shattered fan blade tomorrow, and an interior leak can quickly lead to stained ceilings and costly water damage.
Identifying Problematic RV AC Noises
Not every sound your AC makes is a cry for help, but some definitely are. The first thing you need to do is play detective. Pinpoint where the noise is coming from and what it sounds like. This simple step will narrow down the list of potential culprits in a big way.
Here are the most common offenders I’ve run into over the years and what they usually mean:
- Rattling or Banging: This almost always points to something that has shaken loose. The constant vibration from being on the road can easily loosen the mounting bolts holding the unit to the roof or the compressor to its base. It could also just be debris, like a twig or leaf that has found its way into the fan housing.
- High-Pitched Squealing: A persistent squeal is the classic sign of a failing motor bearing. As the lubrication inside the fan motor bearing wears out, the metal-on-metal friction creates a piercing sound that only gets worse over time.
- Loud Clicking or Grinding: If you hear a loud click followed by a grinding noise when the compressor tries to kick on, that can signal a serious internal issue with the compressor itself. This is one of the more serious sounds and often means it’s time to call in a professional.
Real-World Scenario: On a trip through Arizona, my AC started making a terrible rattling noise every time we hit a bump. Up on the roof, I found that two of the four main mounting bolts holding the unit down had vibrated almost completely loose. A few minutes with a wrench silenced the noise and prevented the unit from potentially shifting and breaking its roof seal.
Diagnosing and Fixing Water Leaks
Seeing water drip from your ceiling unit is never a good feeling, but it’s important to figure out whether you’re dealing with condensation or rainwater. Condensation comes from the AC’s normal operation, while rainwater means you’ve got a bad seal somewhere.
A properly working AC pulls a ton of humidity out of the air. This moisture condenses into water and is supposed to drain outside onto your roof. When that water ends up inside your RV instead, it’s almost always because something is clogged.
Unclogging Condensate Drain Holes
By far, the most frequent cause of interior water drips is a clogged condensate drain path. The drain pan and small channels built into the AC unit collect the condensation, but over time, they can get plugged up with dust, algae, and other gunk. When the water can’t get out, it backs up and overflows into your RV.
To fix this, you’ll need to get up on the roof.
- First things first, power down completely. Flip the AC breaker to make sure there’s no power going to the unit.
- Next, remove the main plastic shroud to get to the internal components.
- Now, locate the small drain holes or channels, which are usually in the base pan of the unit. They’re often filled with grime.
- Use a piece of flexible wire or a pipe cleaner to gently poke through the blockage and clear the path. A can of compressed air can also work wonders to blow out any stubborn debris.
Inspecting the Rooftop Gasket
If the leak only shows up after it rains, the culprit isn’t your AC’s operation—it’s the thick foam gasket that creates a watertight seal between the AC unit and your RV’s roof. Over the years, this gasket can get compressed, cracked, or just plain worn out from sun exposure.
Believe it or not, an overtightened gasket can also be the problem. The bolts that secure the AC from inside your RV are designed to compress the gasket by about 50%. If they’re cranked down too hard, it can squeeze the gasket out of shape and either block the weep holes or create new gaps where rainwater can sneak in. Checking that these bolts are properly torqued and replacing a worn-out gasket is a surefire way to stop a rain-related leak for good. Replacement RV AC mounting gaskets are inexpensive and worth doing right.
Knowing When to Call in the Pros for Your AC
There’s nothing quite like the satisfaction of fixing something yourself, but I’ve learned over the years that a smart RVer also knows when it’s time to put the tools down. Plenty of RV air conditioner troubleshooting is perfect for a hands-on owner, but some problems cross into territory that demands specialized gear, licensed training, and a level of risk you just shouldn’t take on.
Knowing your limits isn’t giving up; it’s being wise. It keeps you safe, stops you from turning a small problem into a catastrophic one, and, most importantly, gets your AC fixed the right way. Certain symptoms are giant red flags telling you the issue is beyond a simple part swap.
Red Flags That Mean It’s Time for a Pro
When the problems go beyond dirty filters or a finicky capacitor, it’s time to hit pause. These issues usually involve the sealed, high-pressure guts of your AC system or tricky electrical faults that are downright dangerous to diagnose without proper experience.
If you see any of these signs, it’s time to pick up the phone and call a certified RV tech:
- Signs of a Refrigerant Leak: If you spot an oily, greasy film on your evaporator or condenser coils, that’s the classic calling card of a refrigerant leak. Unlike a home AC, RV units are factory-sealed and can’t just be “topped off.”
- Constant Freeze-Ups: Have you cleaned the filters and coils until they sparkle and confirmed the airflow is perfect, but the unit still ices over? This almost always points to low refrigerant.
- Loud Compressor Noises: A happy compressor has a steady hum. A dying one will make you cringe with loud, metallic grinding, clanking, or screeching noises when it tries to kick on.
- The Breaker Still Trips: You’ve already replaced a bad start capacitor, but the breaker trips the second the AC tries to start. This is a strong indicator that the compressor motor has seized up or has a dead short.
A quick but important note: Handling refrigerant is not a DIY project. Federal law requires anyone servicing these systems to have an EPA Section 609 certification. Trying to mess with these sealed systems without the right equipment can lead to severe frostbite and the release of environmentally nasty chemicals.
The Two Big “Don’t Touch” Issues
In my experience, two problems stand out as absolute, non-negotiable reasons to call for professional help: a suspected refrigerant leak and a failing compressor. Think of these as the heart and blood of your air conditioner—working on them is a whole different ballgame.
Diagnosing a Refrigerant Problem
A certified tech will roll up with a set of gauges to properly test the high- and low-side pressures in your AC system. This is the only way to know for sure what’s going on with the refrigerant. They can also use electronic “sniffers” or UV dye to pinpoint the exact source of a leak, something that’s practically impossible to do on your own.
Dealing with a Failed Compressor
The compressor is, by far, the most expensive part of your air conditioner. If you suspect it’s failing, a technician can confirm it and give you a real-world cost breakdown. In many cases, the cost of replacing a compressor—once you factor in labor and recharging the system—can be 70% or more of the price of a whole new rooftop unit.
A pro can help you weigh the options. Does it make sense to sink that much cash into an older unit, or would you be better off investing in a new, more efficient model that comes with a fresh warranty? Getting that expert advice can save you from throwing good money after bad. If it’s time to upgrade, you can compare models in our RV rooftop air conditioner category.
Simple Maintenance to Prevent Future AC Breakdowns
I’ve learned over the years that the best way to handle RV air conditioner troubleshooting is to avoid it altogether. A little bit of proactive care really does go a long way in keeping your unit humming, stretching its lifespan, and making sure you don’t get stuck sweating on your next big trip. Trust me, routine upkeep is way easier than an emergency repair on the side of the road.
This isn’t some complicated, all-day project. It’s really just about building a few simple habits into your regular RV routine. By staying on top of these small tasks, you’ll catch minor issues before they turn into trip-ruining disasters.
Create a Realistic Filter Cleaning Schedule
Your interior air filters are the first line of defense against all the dust, pollen, and pet dander that tries to invade your rig. A clogged filter is hands-down the number one reason I see for weak cooling and frozen-up coils. How often you clean them really depends on how you travel.
- Weekend Warriors: If you’re just camping a few times a year, cleaning the filters at the start and end of the season is usually plenty.
- Full-Time RVers or Pet Owners: You’ll want to inspect and clean your filters every 2-4 weeks. If you’re spending time in dusty spots like the desert, you’ll need to check them even more often.
- Traveling with Pets: Fur is a filter’s worst enemy. I’d recommend checking them every other week to keep the air moving and the quality inside your rig fresh.
Just pop them out, give them a gentle wash with soap and water, and let them dry completely before putting them back. It’s a five-minute job that makes a huge difference in performance. When they finally wear out, swap in new AC intake filters.
Your Annual Rooftop Inspection
Once a year, usually before that first big trip of the season, it’s a smart move to get up on the roof for a quick look-around. This checkup helps you spot any wear and tear from the road and weather before it becomes a real problem.
Pro Tip: An AC unit cover is one of the best, cheapest investments you can make for your RV. During storage, it shields the plastic shroud from sun damage and, more importantly, stops wasps, mud daubers, and mice from building nests inside. I’ve seen those critters destroy fan blades and completely block airflow. A simple RV AC cover can save you a lot of grief.
Here’s what I look for during my annual check:
- Clean the Condenser Coils: Gently spray the outside coils with a non-corrosive coil cleaner and rinse it off. This gets rid of all the road grime and debris that builds up and suffocates your AC.
- Clear Out Debris: Take the shroud off and clear out any leaves, twigs, or old nests from around the fan blades.
- Check the Mounting Bolts: Make sure the bolts holding the unit to the roof are snug. Road vibrations can loosen them over time, leading to annoying rattles and even potential leaks.
A well-maintained air conditioner is a reliable one. Committing to this simple maintenance plan will keep you cool and comfortable for many seasons to come.
To make things even easier, here’s a simple schedule you can follow to keep your AC in prime condition.
Seasonal RV AC Maintenance Schedule
A little preventative maintenance is the key to a long and happy relationship with your RV’s air conditioner. This checklist breaks down the essential tasks and when you should do them to keep things running smoothly all season long.
| Task | Frequency (During Camping Season) | Importance |
|---|---|---|
| Clean/Replace Interior Air Filters | Every 2-4 Weeks (or more if needed) | High |
| Inspect/Clean Condenser Coils | Annually (Before season starts) | High |
| Check for & Clear Debris in Unit | Annually & After Storms | Medium |
| Tighten AC Mounting Bolts | Annually | Medium |
| Inspect AC Shroud for Cracks | Annually | Medium |
| Test Thermostat Function | Monthly | Low |
| Check for Unusual Noises/Vibrations | Every Trip | High |
Sticking to a schedule like this turns maintenance from a chore into a simple habit. It’s the best way I know to guarantee a cool, comfortable RV every time you hit the road.
Frequently Asked RV AC Questions
Even with the best guide in hand, some questions always seem to pop up right when you’re elbow-deep in a repair. I’ve heard just about all of them over the years, so I’ve put together some quick, straightforward answers to the most common ones we get from fellow RVers. Think of this as your go-to cheat sheet for rv air conditioner troubleshooting.
Why Is My RV AC Running but Not Cooling?
This is, without a doubt, the number one question I get. Before you start thinking the worst—like a big, expensive refrigerant leak—take a breath and check the simple stuff first. The culprit is almost always airflow.
A dirty, clogged air filter is the prime suspect. It literally chokes the system, which can cause the evaporator coil to freeze into a block of ice. Likewise, if the condenser coils on the roof are caked in dirt and debris, they can’t get rid of heat. Start by cleaning your coils and popping in a fresh filter. That simple fix solves the problem over 90% of the time. If it doesn’t, then it might be time to talk to a pro or look at your options for a new RV rooftop air conditioner.
Can I Run My RV AC on a Regular Household Outlet?
You can, but you really shouldn’t. While you can use an adapter to plug into a standard 15-amp or 20-amp household outlet, it just doesn’t have the juice to handle a power-hungry AC compressor.
You might get the fan to spin, but the second the compressor tries to kick on, you’ll almost certainly trip the breaker. To run your air conditioner properly and safely, you need a dedicated 30-amp or 50-amp RV power source, either from a campground pedestal or a generator that’s up to the task.
A quick pro-tip: trying to run your AC on low voltage over and over again can cause serious damage to the compressor over time. It’s always better to find an adequate power source than to risk frying expensive equipment. A plug-in AC voltage monitor can help you keep an eye on shore power quality.
How Often Should I Clean My RV AC Filter?
This really depends on how and where you camp. As a general rule of thumb, I’d say inspect the filter at least once a month during your main camping season.
But you’ll want to adjust that schedule based on your travels:
- Dusty or desert locations: The filter can get clogged fast. Check it every week or two.
- Traveling with pets: Fur is a filter’s worst enemy. A bi-weekly check is a smart move.
- Humid climates: All that moisture in the air makes dust and pollen stick like glue, so you’ll want to clean it more often.
Honestly, keeping that filter clean is the single most important piece of preventative maintenance you can do for your AC. When in doubt, just keep a few extra replacement filters in a drawer.
Is It Normal for Water to Drip from My RV Roof?
Absolutely. Seeing water dripping off the roof is a good sign—it means your air conditioner is doing its job! The AC unit is designed to pull humidity out of the air inside your rig. That moisture condenses on the cold coils and is channeled out through drain holes, where it just runs off the roof.
The time to get worried is when you see water dripping inside your RV. That’s a red flag. It usually points to a clogged condensate drain line or a failing rooftop gasket. You’ll want to get that fixed right away to avoid any nasty water damage.
When you’re ready to get your AC running like new, whether you need a simple start capacitor, new filters, a surge protector, or a whole new rooftop unit, RVupgrades.com has you covered. We’ve got over 20,000 parts in stock and ready to ship. Start with our RV air conditioner selection and all the supporting RV AC parts and accessories you need at RVupgrades.com.


