
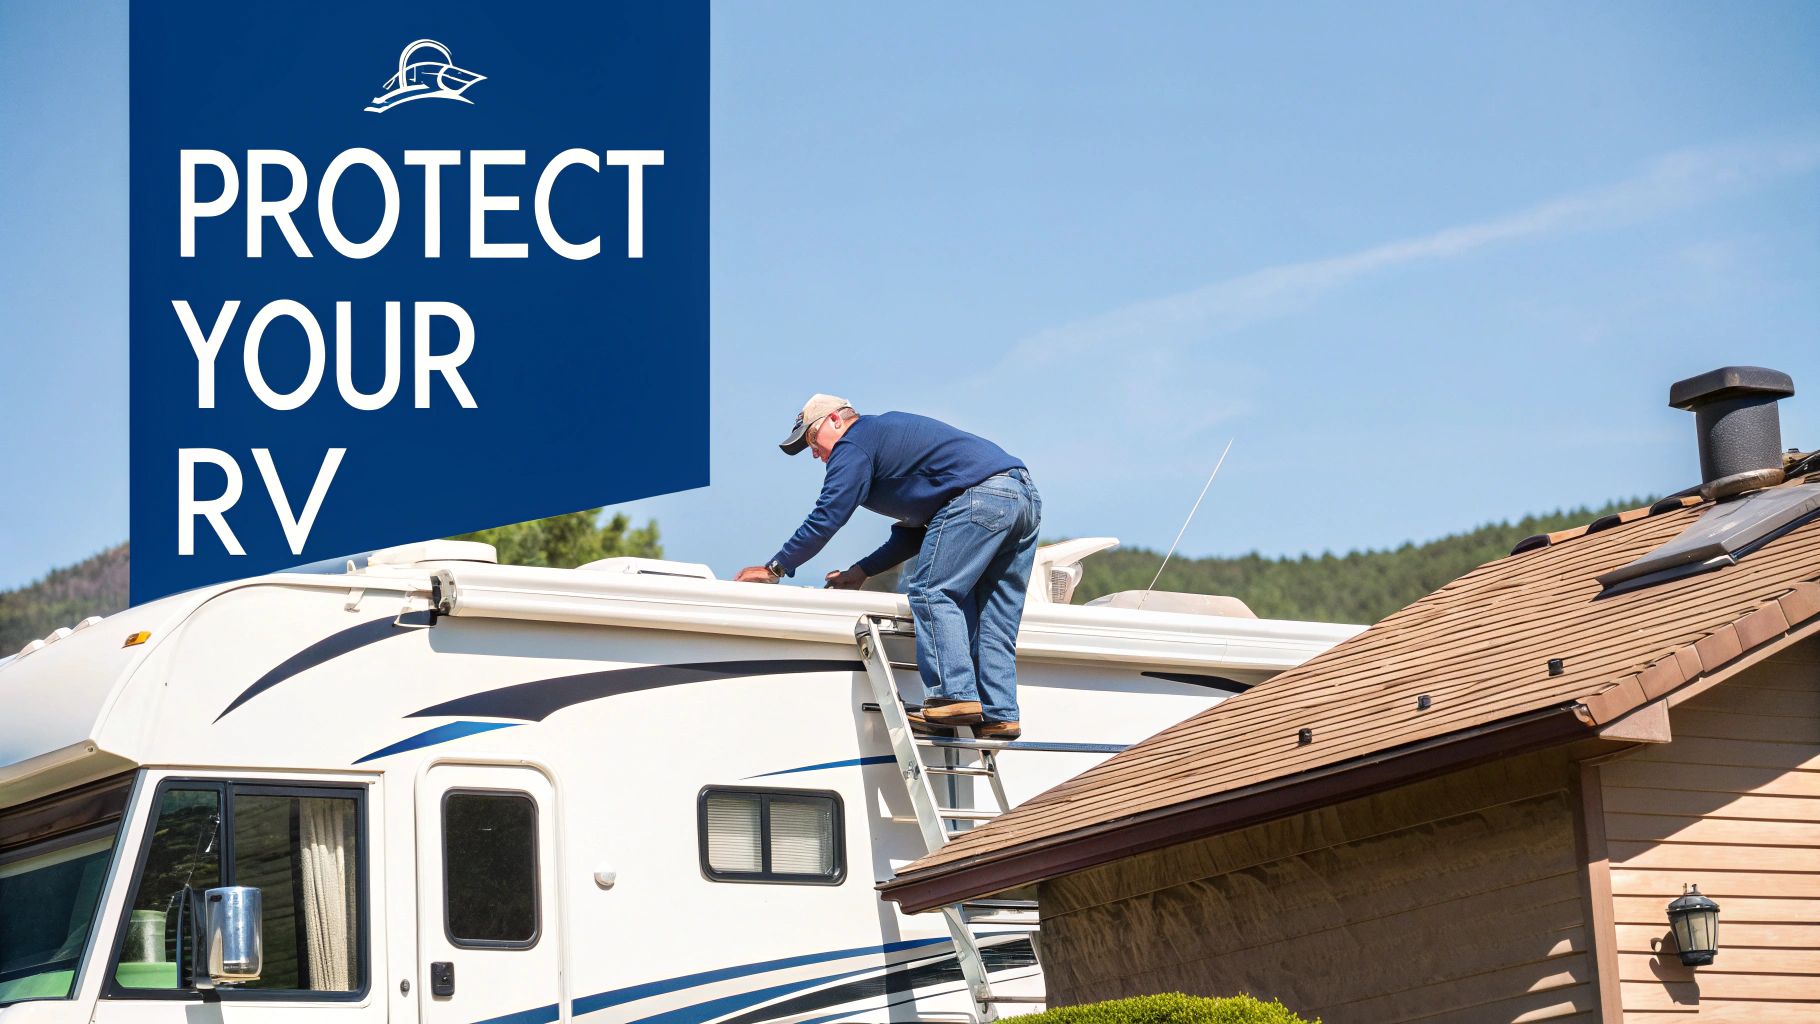
If you’ve ever had to scramble to close your RV’s roof vent during a surprise rainstorm, you already know why installing a vent cover is one of the best—and easiest—upgrades you can make. It’s a simple protective housing that fits right over your existing vent, but its impact is huge. It lets you keep fresh air flowing, rain or shine, while protecting your vent from damage. You’ll find a wide range of options in the RV roof vent covers category at RVupgrades.com.
Why This Is a Must-Do RV Upgrade
Before you grab a ladder, let’s talk about why this is one of the smartest projects any RVer can tackle. This isn’t just about keeping a little rain out; it’s a proactive move that protects your investment and seriously improves your comfort on the road.
An unexpected downpour while you’re out hiking can lead to a soaked interior, kicking off a battle with musty smells and even mold. A vent cover eliminates that worry. You can leave the vent open for constant air circulation, reducing condensation buildup overnight without becoming an amateur meteorologist.
The Real Value of Protection
The plastic lids on standard RV vents are notoriously fragile. After a few seasons of sun exposure, they get brittle and become prime targets for hail, or even a low-hanging tree branch. A good vent cover acts like a helmet for your vent, taking the hit and saving you from a frustrating and expensive replacement job.
More importantly, it’s a critical defense against water infiltration—the arch-nemesis of every RV owner. Even a small leak can lead to serious hidden damage over time. By shielding your vents, these covers keep rainwater out while letting air flow freely. It’s a fundamental part of good RV maintenance that prevents moisture buildup and costly interior repairs. You can find more on the protective benefits of RV roof vent covers from industry experts who’ve seen it all.
Everyday Comfort and Convenience
Damage prevention is huge, but the daily benefits are what you’ll notice most. Ever tried running your bathroom fan to clear out steam from a shower while it’s raining? Or wanted to vent cooking smells without letting a storm in? Without a cover, you can’t. With one, you can maintain ventilation and keep humidity in check, no matter what the weather is doing outside.
A vent cover transforms your RV’s ventilation from a fair-weather feature into an all-weather necessity. It’s a small investment that pays big dividends in longevity, comfort, and peace of mind.
At the end of the day, this isn’t just a “nice-to-have” accessory. It’s a foundational part of responsible RV ownership that protects your rig from some of the most common and expensive headaches on the road.
Your Essential Toolkit for a Flawless Installation
Having the right tools on the roof with you from the very beginning is the difference between a quick, satisfying job and a frustrating afternoon of climbing up and down a ladder. Think of this less as a simple list and more as a strategy to get the project done safely and correctly on the first try.
Before you even think about climbing up there, let’s talk safety. You’ll need a solid ladder that reaches well above the roofline, shoes with good grip, and a pair of safety glasses to keep stray debris or sealant out of your eyes. And trust me on this one—grab some knee pads. An RV roof gets mighty uncomfortable after just a few minutes of kneeling. A simple pair from the knee pads and safety gear section is worth it.
Core Tools and Hardware
These are the non-negotiables for getting a professional-grade seal that won’t give you trouble down the road. It’s the small details, like using the right drill, that make all the difference.
- Variable-Speed Cordless Drill: This gives you precise control when you’re driving screws into a plastic vent flange, which seriously cuts down the risk of over-tightening and cracking the plastic.
- Correct Drill Bits: You’ll want a bit that’s just a tad smaller than the diameter of your mounting screws. This creates a pilot hole that allows the screw to bite in for a snug, secure fit without splitting the material.
- Stainless Steel Hardware: Even if your new vent cover comes with screws, I always recommend swapping them for 100% stainless steel hardware. It’s the single best way to avoid those ugly rust streaks that can appear on your roof after the first big rainstorm. You can stock up on stainless steel RV screws and washers easily.
- Measuring Tape and Pencil: A classic for a reason. Taking accurate measurements is crucial, especially for drill-style installations, to make sure the cover is perfectly centered and secure.
Sealants and Cleaning Supplies
This is probably the most critical part of the entire installation. Your RV roof is constantly expanding and contracting with temperature changes, and your sealant needs to be flexible enough to move with it without breaking its bond.
Your choice of sealant isn’t a one-size-fits-all deal. It has to be compatible with your specific roof material. Using the wrong stuff is a guaranteed recipe for leaks later on. A self-leveling lap sealant is what you need for a durable, waterproof seal around any hardware on a flat, horizontal surface.
For the common EPDM or TPO rubber roofs, a product like Dicor 501LSW is the industry go-to for a reason. It’s specifically designed to stick to these materials and stay flexible. You’ll find it and similar products in the RV roof sealants & Dicor lap sealant category. To get the surface ready, you’ll need some denatured alcohol or a non-solvent cleaner and a few clean rags to wipe away every last bit of dirt and old sealant residue. A clean surface is essential for a perfect bond.
To make things easier, I’ve put together a checklist of what you’ll absolutely need versus what’s just nice to have on hand.
Essential Toolkit and Materials Checklist
Here’s a breakdown of the items I recommend having within arm’s reach before you start. It separates the “must-haves” from the “good-to-haves” that just make the job go a little smoother.
| Item | Type/Specification | Why It’s Important |
|---|---|---|
| Lap Sealant | Dicor Self-Leveling (for EPDM/TPO) | Creates a flexible, watertight seal that moves with the roof, preventing cracks and leaks. |
| Caulking Gun | Standard Drip-Free Model | Allows for precise, controlled application of sealant for a clean and effective barrier. |
| Putty Knife/Scraper | Plastic (Not Metal) | Safely removes old, stubborn sealant without gouging or tearing your delicate roof membrane. |
| Utility Knife | Sharp Blade | Useful for trimming sealant tubes cleanly and cutting away any hardened old materials. |
Having this gear prepped and ready will save you a ton of hassle and ensure your new vent cover is installed securely and, most importantly, leak-free. Most of these pieces can be grabbed in one go from the RV roof repair & sealant section.
Time to Install Your RV Vent Cover
Alright, with your tools laid out, it’s time to get this done. The key here isn’t speed; it’s being methodical. We’re going to walk through the installation for the two most common vent cover styles out there, so you’ll know exactly what to do no matter which one you have.
This whole process really boils down to three key things.
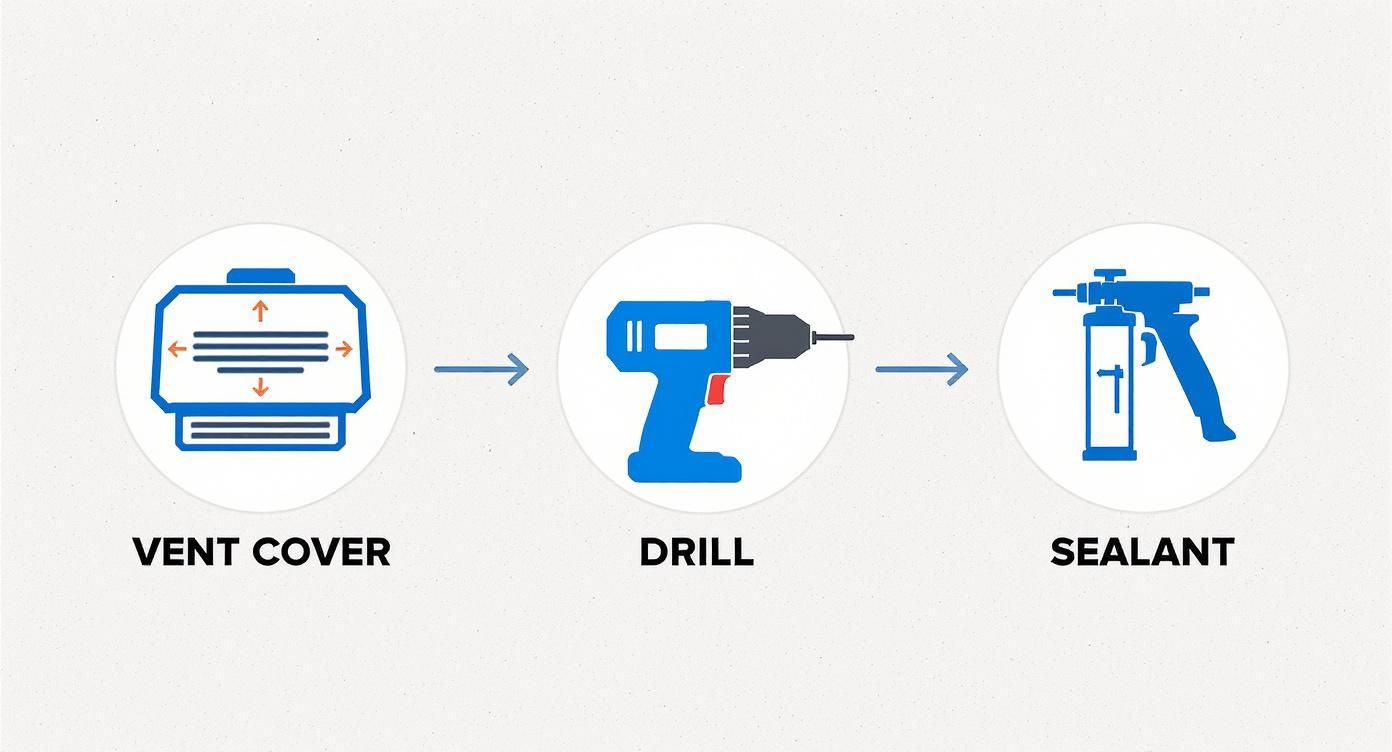
As you can see, it’s all about the cover, how you attach it (the drill), and how you make it waterproof (the sealant). Get those three parts right, and you’re golden.
No-Drill Vent Cover Installation
The “no-drill” style is a fantastic design that saves you a ton of hassle. Best of all, you don’t have to put any new holes in your roof. These covers cleverly use brackets that bolt directly onto the vertical metal flange of your existing roof vent. Many of the MaxxAir and similar models in the vent cover section use this setup.
First, go ahead and assemble the four mounting brackets that came in the box. You’ll usually have a carriage bolt, a flat bracket piece, a lock washer, and a nut for each one.
Now, take those assembled brackets up to the vent. You’ll want to position them so the flat part of the bracket slides underneath the vent’s metal flange, with the bolt pointing straight up. Just hand-tighten the nuts for now—you want them to stay put but still have a little wiggle room for adjustments.
Carefully place the new vent cover over the bolts. You might need to jiggle the brackets around a bit to get all four bolts to pop through the holes in the cover. Once they’re all lined up and through, secure the cover with the washers and nuts provided in your kit.
Pro Tip: When tightening the nuts, use a star pattern, just like you would on a car’s lug nuts. This ensures the pressure is even all the way around and keeps the plastic base from warping. Snug them down, but don’t go crazy and overtighten. You can easily crack the plastic if you apply too much force.
Traditional Drill-Style Installation
If your cover is the drill-in type, then precision is the name of the game. This method gives you an absolutely rock-solid connection, but it requires some careful measuring and marking to get it right. Trust me, taking your time here will pay off. For some extra visual help, Camping World has a good guide on the vent cover mounting process.
To get started, place the cover over your vent and get it perfectly centered. Once you’re happy with the position, grab a pencil and mark where each of the four mounting brackets will sit on the vent frame.
Set the cover aside and hold one of the brackets up to your pencil marks. Use the bracket itself as a template to mark the exact spots where you’ll need to drill your pilot holes. Repeat for all four bracket locations.
Securing and Sealing the Brackets
Okay, it’s time to drill. Grab a drill bit that’s just a little bit smaller than your screws. Carefully drill shallow pilot holes into the plastic vent frame on each mark you made. This little step is crucial—it prevents the plastic from splitting when you drive the screws in.
Before you attach the brackets, peel off a small piece of butyl tape and press it onto the back of each one. This creates your first layer of waterproofing, acting like a gasket. (If you don’t have any, a roll of RV butyl tape is something you’ll use all over the rig.) Now, you can secure each bracket with your stainless steel screws. Get them snug, but don’t tighten so hard that you strip the plastic.
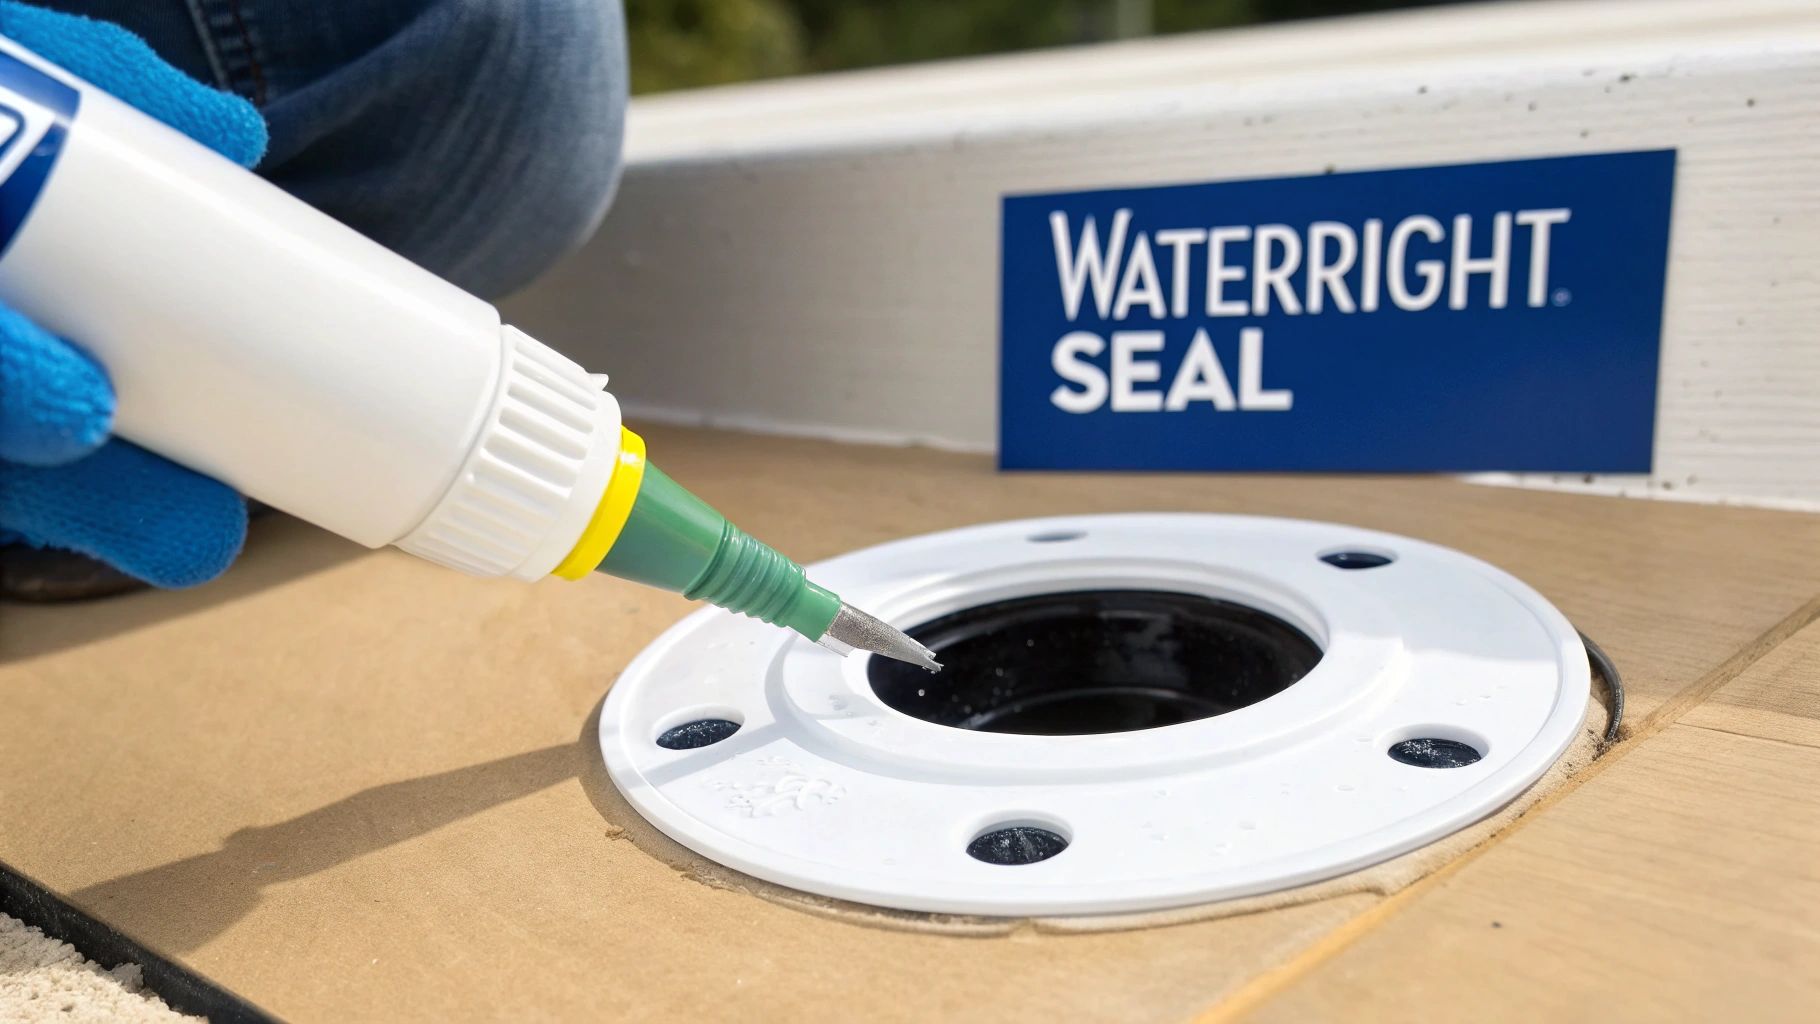
Finally, we’re at the most important part for making this whole thing waterproof: the sealant.
- Put a generous dab of self-leveling lap sealant right over each screw head. Don’t be shy with it.
- Next, run a clean bead of sealant along the top and side edges of each bracket where it meets the vent frame.
This one-two punch of sealing—butyl tape underneath and lap sealant on top—creates a tough, flexible, and totally waterproof barrier that will keep your RV dry for years to come.
Common Installation Mistakes You Need to Avoid
The best shortcut in the RV world is learning from someone else’s mistakes. When you’re putting on a new vent cover, a few common slip-ups can turn a simple weekend project into a leak-chasing nightmare. Think of this as your pre-flight check to get it right the first time.
One of the easiest mistakes to make is over-tightening the mounting hardware. You’d be surprised how brittle the plastic flange on your existing roof vent can be. Just a quarter-turn too far with your drill or wrench is all it takes to create a hairline crack. You might not even see it until water starts dripping inside during the next downpour.
Treat it like you’re tightening the lid on a plastic jar—you want it snug and secure, but not so tight that the plastic starts to stress. This is exactly why I recommend using a variable-speed drill. It gives you that fine-tuned control to stop the instant the screw is seated, no more and no less.
The Dangers of Hidden Wires and Poor Airflow
Another serious landmine is drilling right into your RV’s rooftop wiring. This is a classic “measure once, cut twice” situation, but with much more shocking consequences. A lot of RVs have 12-volt wiring for lights and fans running just under the roof membrane, often right alongside the vent openings.
Before you drill a single hole for a traditional mount, pop your head inside the rig and look up into the vent opening. You can usually spot wires tucked neatly along the frame. If there’s any doubt in your mind, just play it safe and go with a no-drill vent cover model. It’s a far better option than facing a complicated and costly electrical repair.
It’s also super important to match the cover to your fan. If you slap a standard vent cover over a high-powered fan like a MaxxAir or Fan-Tastic Vent, you’re going to choke its airflow. This forces the fan’s motor to work overtime, leading to overheating and a much shorter lifespan.
Choosing the wrong vent cover is like trying to breathe through a coffee straw. Always make sure your cover’s airflow capacity can handle your fan’s power. It’ll help the fan work efficiently and last for years to come. High-flow designs like many in the MaxxAir-style vent cover lineup are built specifically for this.
Other Common Oversights
A few other small, easy-to-miss details can completely undermine your installation. Here are some quick things I always double-check:
- Forgetting to Seal Screw Heads: Every single hole you make in your roof is a potential leak. Even if you’ve got butyl tape under the brackets, a dab of self-leveling lap sealant over each screw head is that final, critical line of defense against water. Don’t skip it.
- Using the Wrong Sealant: Not all sealants are created equal. I see people use silicone on an EPDM or TPO roof all the time, and it’s a huge mistake. Silicone won’t bond properly and will eventually peel away, guaranteeing a leak. Stick with a purpose-made lap sealant like Dicor 501LSW or similar products in the RV roof sealant section.
- Not Cleaning the Surface Properly: Any leftover dirt, grime, or old sealant on the vent frame will stop the new hardware and sealant from getting a solid, watertight grip. A quick wipe-down with denatured alcohol takes seconds, and it’s a step you just can’t afford to skip.
Creating a Truly Watertight Seal
Let’s be honest, a vent cover that isn’t sealed properly is worse than no vent cover at all. It just becomes a funnel for leaks. This step—the waterproofing—is where you really earn your stripes. It’s what makes sure all your hard work holds up against bumpy roads, wild temperature swings, and those pop-up thunderstorms that always seem to appear out of nowhere.
The secret weapon for this job is self-leveling lap sealant. This isn’t your average household caulk. It’s a special formula made specifically for the flexing and movement of an RV roof. As it sets, it flows just enough to fill every tiny crack and gap, creating a smooth, seamless barrier that moves with your rig.
Choosing and Applying the Right Sealant
For any horizontal surface, like the base of your vent cover brackets or around the screws, self-leveling sealant is the only way to go. A product like Dicor 501LSW is the industry standard for a good reason—it’s formulated to bond with common EPDM and TPO roofing. Whatever you do, don’t use standard silicone. It just won’t stick properly to the roof material and is guaranteed to fail over time.
Of course, having the right stuff is only half the battle. Your application technique makes all the difference. The goal is total, gap-free coverage without making a huge mess.
- Seal Every Screw Head: Put a generous dab of sealant right over the top of each screw. You want the entire head completely buried. This is one of the most common spots for water to find its way in.
- Encapsulate the Brackets: Run a nice, continuous bead of sealant along the edges where the mounting brackets touch the roof. Think of it as “encapsulating” the base of the bracket, leaving zero path for moisture to sneak under.
A proper seal should look substantial. This isn’t the time to be shy with the sealant. A thin, wimpy line won’t cut it. You want a thick, confident bead that completely covers any potential weak spot.
Inspecting Your Work for Peace of Mind
Once you’ve laid down the sealant, take a step back and give it a final look. A good seal will be totally continuous, with no gaps, bubbles, or thin areas. The self-leveling magic will smooth it out, but you should still double-check that every screw and bracket edge is totally covered.
Now comes the hard part: waiting. Let the sealant cure according to the manufacturer’s directions, which is usually around 48 hours for a full, weatherproof cure. I know it’s tempting to pack up and go, but this little bit of patience is your final investment in a leak-free rig. It gives you that peace of mind when the sky starts to darken on your next trip.
Looking After Your New Vent Covers
Getting your new vent covers installed is a great first step, but don’t just set it and forget it. A little bit of routine care is the real secret to making sure they last for years on the road. Just a few minutes of inspection each season will protect your investment and keep your RV sealed up tight.
Think of it as a quick, simple check-up for one of your RV’s most important defenders against the elements. Trust me, this small time commitment pays off big time by letting you catch minor issues before they turn into major headaches. You’re just looking for the subtle signs of wear and tear that are bound to happen over thousands of miles and countless weather changes.
A Simple Maintenance Schedule
The best way to stay ahead of problems is to get into a regular inspection routine. Most folks in the know suggest checking your vent covers at least twice a year, but you’ll want to do it more often if you’re in a harsh climate or just went through some nasty weather. For instance, a quick look after a hailstorm or a long winter in a snowy area is always a smart move. You can learn more about how top RV experts advise on vent cover care to avoid nasty surprises like water leaks or blocked airflow.
When you’re up there, keep an eye out for a few specific things:
- Hairline Cracks: Look closely at the plastic, paying special attention to the areas around the mounting points. Small cracks can grow surprisingly fast from road vibrations and constant sun exposure.
- Worn-Out Sealant: Check the lap sealant around the mounting brackets. It should feel solid but still flexible. If you see it pulling away, cracking, or looking chalky, it’s time for a touch-up with fresh RV roof sealant.
- Loose Hardware: Gently wiggle the cover and check if any of the mounting nuts or screws have worked themselves loose over time.
A five-minute inspection every spring and fall is all it takes to make sure your vent covers are secure and watertight. It’s a simple habit that can save you from discovering a leak during a downpour—which, as we all know, is the worst possible time.
Cleaning and Knowing When to Call It Quits
Cleaning your vent covers is about as easy as it gets. Just grab a soft brush, some gentle, RV-safe cleaner, and water to get rid of any built-up dirt, leaves, or road grime. Steer clear of harsh chemicals or abrasive scrubbers—they can damage the plastic and strip away its UV protection.
Even with the best care, vent covers won’t last forever. The average lifespan for a typical plastic cover is somewhere in the 3 to 5 year range. Big red flags that it’s time for a replacement include widespread cracking (sometimes called “crazing”), a lot of discoloration, or the plastic becoming brittle when you touch it. Being proactive and replacing it before it fails will save you from a major hassle on the road. When it’s time, you can drop a new one into your cart from the vent cover selection.
Your Top RV Vent Cover Questions Answered
Even after walking through the steps, a few questions always seem to pop up. I get it. When you’re drilling into your roof, you want to be 100% sure. Let’s tackle some of the most common questions I hear from fellow RVers to clear up any confusion and get you ready to finish this project with confidence.
Can I Install a Vent Cover Over My Bathroom Fan?
Yes, you absolutely can, and I’d say you absolutely should. Putting a cover over your bathroom fan is a game-changer. It means you can run the fan to pull out all that shower steam and, well, other odors, even when it’s pouring rain outside. This is one of the best ways to fight back against mold and mildew in a high-humidity spot.
The key thing to check is clearance. Make sure the cover you pick is tall enough for your specific fan model. If you’ve got a high-powered fan like a MaxxAir or Fan-Tastic Vent, you’ll want to pair it with a high-flow cover so you don’t choke its performance. Look for "high-flow" or "MaxxAir-compatible" options in the vent cover category.
Do I Really Have to Scrape Off All the Old Sealant?
Not every last speck, but you definitely need a clean, solid surface to work with. The good news is that the mounting brackets for your new cover usually attach to the vertical sides of the vent frame, which are often free of that thick lap sealant.
However, if any part of your new installation is going to sit on top of old sealant, you’ve got to get rid of any loose, cracked, or peeling bits. I use a plastic scraper for this. The new sealant needs a clean base to grab onto if you want a waterproof seal that’s going to last for years.
My rule of thumb is simple: new sealant will not stick to old, failing sealant. Always take a few extra minutes to scrape back to a clean, solid surface. It’s the secret to a leak-proof job.
What’s the Difference Between a Standard and a High-Flow Cover?
Think of a standard vent cover as your basic, reliable rain protection. It does the job perfectly well. A high-flow (or aerodynamic) cover, like the super popular MaxxAir II, is a step up. It has a much larger opening and a sleeker design that allows for way better airflow.
This makes it the clear winner if you’re covering a high-powered exhaust fan. As an added bonus, that aerodynamic shape is a lot quieter and creates less wind drag when you’re barreling down the highway.
Will a Vent Cover Make My RV Darker Inside?
Yes, it will definitely cut down on the direct sunlight coming through the vent. Most covers are made from opaque or translucent plastic, usually in white or a darker smoke color. They’ll still let in plenty of ambient light, so it won’t feel like a cave, but they do a great job blocking that harsh, direct sun.
Honestly, I see this as a benefit. It helps keep your RV’s interior from turning into an oven on hot, sunny days. If getting as much natural light as possible is your main goal, stick with a cover in a lighter color like white. You can compare smoke vs. white options directly in the vent cover listings.
For all the parts and accessories you need for this project and more, trust the experts at RVupgrades.com. Find the perfect vent cover, roof sealant, butyl tape, stainless hardware, and tools to get the job done right at RVupgrades.com.


