
Learning how to clean an RV roof is pretty straightforward: a simple, low-pressure rinse, a gentle scrub with a soft brush and a roof-specific cleaner, and a final thorough rinse to get rid of any residue. This simple bit of upkeep is absolutely critical for stopping leaks, UV damage, and those eye-watering structural repair bills nobody wants to see. If you’re opening the rig up for the season, this pairs perfectly with a full RV spring startup checklist so you don’t miss any other major systems.
Why Your RV Roof Deserves Your Attention
Your RV’s roof is its unsung hero. It’s up there silently protecting you and your investment from blistering sun, pounding rain, and whatever else nature throws at it. But just because it’s out of sight doesn’t mean it should be out of mind. A little neglect up top can quickly turn that protective shield into a major headache, leading to some of the most dreaded problems in the RV world.
Think of routine cleaning as more than just a chore—it’s your best preventative maintenance strategy. A clean roof is the only way you’ll spot potential issues like cracked sealant or small tears in the membrane before they let water sneak in. Unchecked water intrusion is the absolute number one enemy of an RV. It often leads to delamination, rotted wood framing, and mold, which can easily turn into repairs costing thousands. If you’re already seeing soft spots or significant damage, it’s worth comparing your situation against a detailed guide on how to replace an RV roof before you decide how far you want to go with repairs.
The Real Cost of Neglect
Ignoring your roof doesn’t just risk a leak; it speeds up the wear and tear from the elements.
- UV Damage: The sun’s rays are relentless, and over time they can make roofing materials brittle and chalky.
- Debris Buildup: Piles of leaves, pine needles, and dirt act like a sponge, trapping moisture against the roof surface. This is a perfect recipe for mildew and algae, which can stain and damage the membrane.
- Sealant Failure: Grime is great at hiding failing sealant around your vents, skylights, and A/C units—the most common places for water to find a way in.
Regular roof inspections, which are easiest to do right after a good cleaning, are your first line of defense. Catching a small gap in the sealant today can save you from a $5,000 repair bill for water damage down the road.
This guide is your complete playbook for keeping your rig’s roof in top shape and preserving its value. I’ll walk you through the practical, real-world steps to confidently inspect, clean, and maintain your roof, no matter what kind of material you have. It’s all about keeping you dry and worry-free on all your adventures.
Before we dive in, let’s get a high-level look at the process.
Here’s a quick cheat sheet to get you started. This table breaks down the entire process into manageable phases, so you know exactly what you’re doing and why.
RV Roof Cleaning At a Glance
| Phase | Key Action | Primary Goal |
|---|---|---|
| Preparation | Gather supplies and safely access the roof. | Ensure safety and efficiency before you start cleaning. |
| Cleaning | Rinse, apply cleaner, and gently scrub the surface. | Remove dirt, grime, and environmental buildup. |
| Treatment | Address stubborn stains, mold, and mildew. | Restore the roof’s appearance and prevent material damage. |
| Inspection | Thoroughly check all seams, seals, and vents. | Identify potential leaks or damage before they worsen. |
| Repair & Protect | Reseal compromised areas and apply protectant. | Prevent water intrusion and extend the roof’s lifespan. |
Think of this as your roadmap. Following these steps in order will not only get your roof sparkling clean but will also ensure it continues protecting your RV for years to come. If you want to zoom out beyond the roof and cover the whole rig, you can also pair this with a printable RV maintenance checklist so roof care isn’t happening in a vacuum.
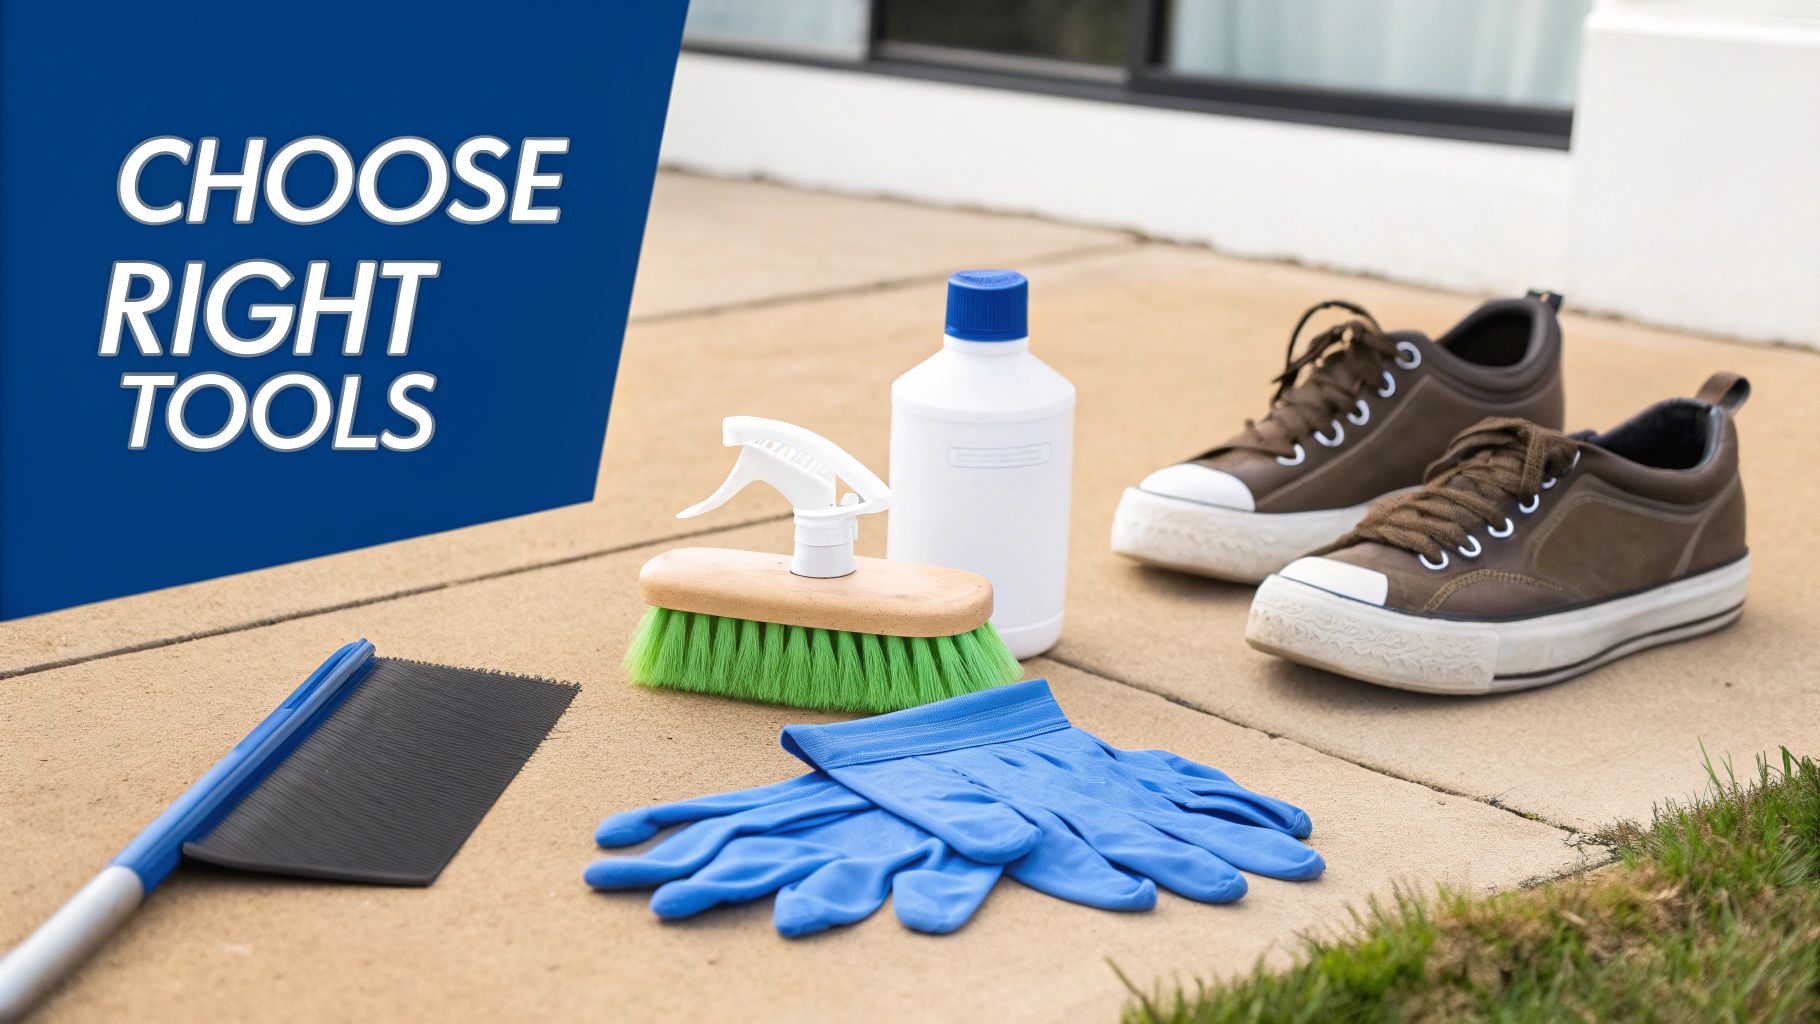
Choosing the Right Tools for Your Roof Type
Using the wrong cleaning gear on an RV roof is a fast track to regret. It’s like taking steel wool to your car’s paint job—it only leads to damage. Before you even think about climbing that ladder, your first job is to know exactly what kind of roof you’re dealing with. A tool that’s perfect for a sturdy fiberglass shell could easily tear a delicate rubber membrane.
The key is matching your equipment to the material. Getting this right from the start not only makes the job easier but also prevents costly mistakes down the road. If you want to go deeper into long-term care and coating choices, this big-picture guide on how to protect your RV roof is a great companion read while you’re planning products and timing.
Identifying Your Roof Material
Most RVs have one of three common roof types, and figuring out which one you have is usually pretty simple. A quick hands-on check is all it takes.
- EPDM (Ethylene Propylene Diene Monomer): This is a very common rubber roofing material that feels slightly soft, almost like a tire’s inner tube. The biggest giveaway, especially on older roofs, is a white, chalky residue that comes off on your hands when you wipe it.
- TPO (Thermal Polyolefin): Another popular rubber membrane, TPO feels slicker and often has a slightly textured, orange-peel-like surface. It’s more puncture-resistant than EPDM and doesn’t usually leave that chalky residue behind.
- Fiberglass: This one’s easy. It’s hard, smooth, and glossy, much like the sidewalls of many RVs. Give it a quick tap with your knuckle—you’ll hear a solid sound, confirming it’s a rigid surface, not a flexible membrane.
Knowing this distinction is everything. For EPDM and TPO, a soft-bristle brush is non-negotiable to avoid scuffs or tears. With the durability of fiberglass, you can often get away with a medium-bristle brush for tougher grime.
Building Your Essential Toolkit
Once you know your roof type, you can assemble the right cleaning arsenal. Your goal here is to be effective without causing harm.
The cleaning solution is your most critical choice. I’ve seen people use household cleaners that permanently damage their roofs. You have to avoid any cleaners with petroleum distillates, citrus ingredients, or harsh abrasives. These ingredients will degrade rubber membranes, making them brittle and weakening the adhesives holding everything together.
Always opt for a pH-neutral, non-abrasive cleaner specifically formulated for your roof type. Using the wrong chemical is one of the fastest ways to void a roof warranty and set yourself up for future leaks.
Here’s what your basic kit should include:
- A Soft or Medium-Bristle Brush: A soft-bristle, long-handled brush is a must for EPDM and TPO roofs. For fiberglass, a medium-bristle brush is perfectly fine.
- The Right Cleaner: Get a dedicated RV roof cleaner designed for either rubber or fiberglass surfaces. An easy way to find options that work with your roof type is to search for RV roof cleaners on RVupgrades.com, or compare specific formulas and roof-material compatibility in our breakdown of the best RV roof cleaners.
- Garden Hose with a Spray Nozzle: A standard hose is all you need. Never use a pressure washer. The intense spray can easily damage seals and the roofing material itself. Trust me on this one.
- Buckets: I like to use two—one for the cleaning solution and another with clean water for rinsing the brush as I go.
Safety Gear Is Non-Negotiable
Working on an RV roof can be dangerous. It gets incredibly slippery when wet, and a fall from that height is no joke. Your safety is just as important as the tools you use for cleaning.
Before you start, make sure you have the right gear to protect yourself. This isn’t an area where you want to cut corners.
Essential Safety Equipment:
- Sturdy Ladder: Make sure your ladder is on stable, level ground and extends well above the roofline for safe access.
- Non-Slip Footwear: Wear shoes with excellent grip. I prefer soft-soled sneakers or deck shoes.
- Gloves and Safety Glasses: Protect your hands from the cleaning chemicals and your eyes from any splashing or debris.
By carefully selecting your tools and putting safety first, you’ll make sure the job gets done right—without causing unintended damage or putting yourself in harm’s way.
The Complete RV Roof Cleaning Method
Alright, let’s get our hands dirty. You’ve got your tools and safety gear ready, so it’s time to actually clean this thing. This isn’t about brute force; it’s about a systematic approach that protects your roof’s delicate membrane while getting it spotless.
Following a proven method ensures every square inch gets the attention it needs without causing accidental damage. The goal is to be both thorough and gentle. A methodical cleaning not only gets rid of the current grime but makes future cleanings a whole lot easier.
The Initial Low-Pressure Rinse
Your first move is always a gentle, low-pressure rinse. Forget about grabbing a pressure washer—that concentrated spray can easily tear a rubber membrane or blast away the sealant around your vents, creating leaks where you never had them before. A simple garden hose with a standard spray nozzle is all you need.
Start at the highest point of your roof, usually around the center A/C unit, and work your way outwards and downwards. Your goal here is simple: dislodge and wash away all the loose dirt, leaves, pine needles, and whatever else has piled up. This initial rinse does a surprising amount of the heavy lifting and keeps you from grinding abrasive grit into the roof when you start scrubbing.
Applying Cleaner the Right Way
Once the loose stuff is gone, you can start applying your roof cleaner. The key here is to work in small, manageable sections. I’ve seen countless RVers spray down their entire roof at once, only to have the cleaner dry into a sticky, soap-scum mess before they can get to it. That residue actually attracts more dirt later on.
To avoid this common mistake, work in sections no larger than 3×3 or 4×4 feet. This strategy does a few important things:
- The cleaner stays wet and active, letting it really penetrate the grime.
- You can thoroughly scrub and rinse one area before moving on.
- It prevents you from accidentally kneeling or stepping in slippery soap suds.
Always start at the front of your RV and work your way back toward the ladder. This way, you aren’t constantly walking over freshly cleaned areas. Apply the cleaner liberally to your first small section and let it sit for a minute or two, just like the product instructions say.
By working in small, controlled sections, you maintain complete control over the cleaning process. This systematic approach guarantees a consistent, streak-free result and prevents the cleaner from drying out, which is a major cause of post-cleaning residue.
The Gentle Scrubbing Technique
With the cleaner on your first section, it’s time to scrub. Remember, we’re not going for aggressive scrubbing; it’s all about gentle agitation. Use your soft-bristle brush (for rubber roofs) or a medium-bristle one (for fiberglass) to work the cleaner into the surface. Use steady, overlapping strokes to lift that embedded dirt.
Pay extra attention to areas around vents, skylights, and the air conditioner, since those spots always seem to collect more gunk. You don’t need to apply heavy pressure—let the cleaner and the brush do the work. The goal is to lift the dirt away from the surface, not to scour the roof material itself.
The All-Important Final Rinse
After scrubbing a section, rinsing it thoroughly is probably the most critical step. Any soap residue left behind becomes a magnet for future dirt and can even encourage mildew growth. Rinse each section completely before you even think about moving to the next one. Use plenty of water and make sure every last sud is washed away.
As you rinse, that dirty, soapy water will run down the sides of your RV. This runoff is what causes those dreaded black streaks. To manage this, it’s a huge help to have a second person on the ground with another hose to rinse the sides as you work. If you’re flying solo, just take frequent breaks to climb down and rinse the sidewalls yourself before the streaks have a chance to dry. This little bit of proactive rinsing saves you a ton of cleanup work later.
For a detailed walkthrough on cleaning your RV roof safely and effectively, you might want to check out this expert guide on how to clean an RV roof.
Establishing a Cleaning Schedule
Knowing how to clean your roof is one thing, but knowing how often is just as important for long-term health. Most RV pros will tell you to clean your roof 3-4 times per year, but that can change depending on where you park.
If you’re often under trees or in humid climates, you’ll find that sap, mold, and mildew build up much faster, demanding more frequent attention. For the very common rubber roofs, using a dedicated rubber roof cleaner is non-negotiable. Harsh chemicals like solvents, abrasives, or citrus-based cleaners can damage the material and weaken the roof’s bonds over time.
Ultimately, this methodical cleaning process—from the first rinse to the final wash-down of your sidewalls—is your best defense against premature aging and expensive repairs. It keeps your roof a reliable shield against the elements, ready for wherever the road takes you next.
Inspecting for Damage and Tackling Tough Stains
Once your roof is sparkling clean, you finally have a clear, unobstructed view of its real condition. With all that dirt and road grime gone, you can give it a meaningful inspection and spot trouble before it turns into a major headache. This is your chance to catch the small stuff that was hiding in plain sight.
Think of this inspection as a non-negotiable part of your RV maintenance. You’re not just looking for obvious holes; you’re hunting for the subtle signs of wear and tear that can lead to catastrophic water damage if you let them slide.
The infographic below shows the basic cleaning flow that gets your roof ready for this all-important inspection.
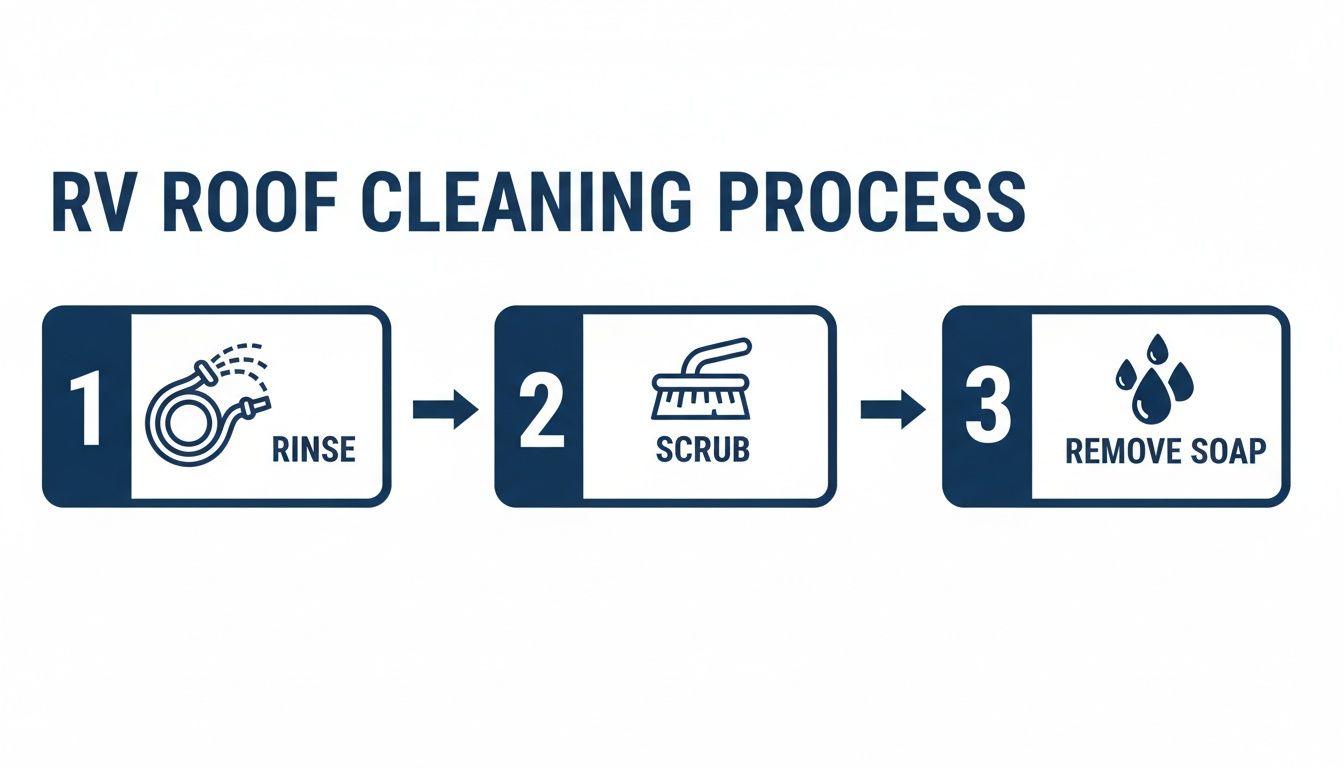
This simple rinse-scrub-rinse process is what clears the deck for an effective visual check-up.
What to Look for During Your Roof Inspection
Take your time with this. A rushed inspection is a useless one. I like to start at one corner and work my way methodically across the whole surface, paying extra close attention to every vent, antenna, and fixture that cuts through the roof. Those are always your most vulnerable spots for leaks.
Don’t be afraid to get down on your hands and knees for a closer look. You’re searching for anything that looks out of place, no matter how tiny.
Your Inspection Checklist:
- Sealant Around Fixtures: Check the lap sealant around every single vent, skylight, antenna, and ladder mount. You’re looking for any cracks, gaps, or places where the sealant is peeling away from the roof or the fixture itself. When you find trouble spots, your next step will be a fresh application of a compatible lap sealant—an easy way to source the right products is to search for self-leveling lap sealant. If you’re not sure which formula you want—self-leveling vs non-sag, silicone vs non-silicone—this comparison of the top RV sealants breaks down when to use what.
- Membrane Condition: Scan the entire roof surface. Are there any bubbles, tears, punctures, or really deep scuffs? A bubble is a bad sign—it could mean the adhesive underneath has failed and moisture is already trapped.
- Soft Spots: As you carefully walk on the roof, pay attention to how it feels under your feet. Any areas that feel spongy or soft are a huge red flag. This often means the underlying wood structure is already water-damaged and rotting.
Catching a one-inch crack in the sealant around your bathroom vent today can literally save you from a $3,000 repair for a rotted ceiling and wall a year from now. Small problems on an RV rarely fix themselves; they only get bigger and more expensive.
If your inspection around the vents turns up cracked plastic lids, brittle vent frames, or you decide it’s just time for an upgrade, this detailed tutorial on how to replace, upgrade, or add an RV roof vent walks through the whole process, including cutting, wiring a powered fan, and sealing everything back up.
Tackling Stubborn Stains and Mildew
Even after a good cleaning, you might still see some stubborn spots. Things like tree sap, baked-on bird droppings, and mildew have a knack for clinging on and need a more targeted approach. The trick is to get them off without damaging your roof material.
Whatever you do, never use harsh, abrasive tools like steel wool or a metal putty knife on a rubber or TPO roof. You’ll cause permanent damage. Instead, a little patience and the right technique usually win the day.
Removing Tree Sap and Bird Droppings
For that hardened tree sap or fossilized bird droppings, start by soaking the spot. Place a rag soaked in warm water and your approved RV roof cleaner right on top of it for 10-15 minutes. This will soften up the gunk.
After it has soaked for a bit, use a plastic scraper or even an old gift card to gently lift the softened mess away. Finish up by giving the area a light scrub with your soft-bristle brush and rinsing it completely.
Fighting Mold and Mildew
Those ugly, dark splotches of mold or mildew are a common sight, especially if you park in shady or humid areas. They don’t just look bad; they can actually degrade the roofing material over time.
To treat them, you can mix up a diluted solution. I’ve had good luck with a DIY mix that’s generally safe for most roof types:
- One part household bleach
- Ten parts water
- A small squirt of gentle, non-citrus soap
Apply this mix directly to the mildew spots and let it sit for about 15 minutes to kill the spores. Then, give it a gentle scrub with your brush. It is absolutely critical to rinse the area completely when you’re done. Any bleach left behind can damage the roof membrane over the long haul. And always, always test any homemade solution on a small, hidden spot first to make sure it doesn’t cause any discoloration.
Distinguishing a Stain from Damage
Finally, you need to know the difference between a simple cosmetic stain and a sign of deeper trouble. A stain from a wet leaf, for instance, is just an aesthetic issue. But a persistent dark spot that keeps reappearing after you clean it could be a sign of moisture seeping up from below the membrane.
If you clean a dark area and it still feels soft or looks like the discoloration is coming from within the material itself, investigate it further. Press on the spot firmly. If it feels spongy, you probably have water intrusion under the roof membrane, and it’s time to call a professional RV technician. This proactive inspection is your single best tool for protecting your RV from its greatest enemy—water.
Protecting Your Roof for Long-Term Durability
Getting your RV roof clean is a fantastic first step, but the job isn’t really done. To truly protect your investment, you need to shift from just cleaning to long-term preservation. I like to think of it like washing and waxing a car—the wash gets rid of the dirt, but it’s the wax that provides that crucial layer of protection. This is the part of the process that saves you from serious headaches and expensive repairs down the road.
Once the roof is spotless and completely dry, you’ve got the perfect canvas to apply products that shield it from its number one enemy: the sun. Relentless UV exposure is what breaks down roofing materials, causing them to get brittle, chalky, and eventually crack. A little proactive protection here makes all the difference.
Applying UV Protectants and Conditioners
A quality UV protectant or roof conditioner is basically sunscreen for your RV. It creates a barrier that deflects those harmful rays, helps keep the material flexible, and can even make your next cleaning job easier by repelling dirt and grime.
Putting these products on is usually pretty simple. Most are just spray-on, wipe-off formulas, or you can use a sponge mop for even coverage. My advice is to work in small, manageable sections and stick to the manufacturer’s instructions. The goal is a nice, even coat across the whole surface without any puddles. Taking this small step once or twice a year can dramatically extend the life of your roof membrane. To see what’s available, search for RV roof UV protectants and conditioners, or dig into broader long-term strategies in our deep dive on protecting your RV roof.
Don’t treat this as an optional add-on. Consistent UV protection is a direct investment in your roof’s longevity. It’s what separates a roof that lasts its full 10-15 year expected lifespan from one that fails way too early.
The Critical Task of Resealing Seams
While UV rays are busy attacking the large surfaces of your roof, the seams are where the real trouble usually starts. This is where most catastrophic leaks begin. The flexible lap sealant used around your vents, skylight, and antenna is a wear-and-tear item. It’s designed to dry out, crack, and pull away over time, creating tiny, invisible pathways for water to sneak in.
Inspecting and resealing these seams is, without a doubt, the single most important preventative maintenance task you can do for your rig. A full roof replacement can set you back anywhere from $3,000 to $10,000, which makes spending a few bucks on sealant each year a no-brainer. Plus, even if you use a protective roof coating, which typically needs reapplication every 5 to 10 years, failing to maintain the seals underneath will just shorten its lifespan. If you’re curious about the numbers, you can learn more about the costs of maintaining an RV roof.
How to Properly Reseal Your Roof
Resealing isn’t just about slapping new sealant over the old, crusty stuff. If you want a durable, waterproof bond that will actually last, you have to get rid of the failed sealant first.
-
Scrape Away the Old Sealant: Grab a plastic scraper or putty knife and gently scrape off any sealant that’s loose, cracked, or peeling away. The key here is gentle—you don’t want to gouge the roof membrane underneath.
-
Clean the Surface: With the old gunk gone, wipe the area down with a clean rag and some denatured alcohol. This step is critical because it removes any residue and ensures the new sealant can get a proper grip.
-
Apply Fresh Lap Sealant: Lay down a generous, continuous bead of self-leveling lap sealant right over the seam. This stuff is designed to flatten out as it cures, creating a wide, watertight seal. You can find compatible options by searching for self-leveling lap sealant on RVupgrades.com.
Make this resealing process an annual ritual. It’s the best thing you can do to keep water out of your RV’s walls and ceiling. When you pair a regular cleaning schedule with proactive UV protection and diligent seam maintenance, you’re building a formidable defense against the elements and safeguarding your RV for many more adventures to come. And if you decide to go one step further while you’re already on the roof, this guide on how to install RV vent covers shows how to add extra protection over those vent lids you just inspected and resealed.
Common RV Roof Cleaning Questions Answered
To wrap things up, let’s tackle some of the most frequent questions I hear from fellow RVers about roof care. These are the real-world queries that pop up when you’re actually up on the ladder, cleaner in hand. My goal is to give you direct, no-fluff answers to help you handle the job with total confidence.
How Often Should I Really Clean My RV Roof?
While the general rule of thumb you’ll hear is 3-4 times a year, your actual schedule should really be dictated by your travel and parking habits. It just makes sense.
If your RV lives under sappy pine trees or in a humid, coastal environment, you’re going to be fighting sap and mildew constantly and will need to clean it more often. Full-timers should get in the habit of doing a quick visual inspection after every long trip.
A practical approach for most people is to peek at it monthly and commit to a full cleaning each quarter. From there, just adjust the schedule based on the real-world conditions your rig faces.
Can I Use a Pressure Washer on My RV Roof?
This is a hard no. A pressure washer is one of the most destructive tools you could possibly use on an RV roof, especially a delicate EPDM or TPO membrane. I’ve seen the aftermath, and the high-pressure stream can cause catastrophic damage in seconds.
Here’s exactly why you should never use one:
- It can physically tear or puncture the roof membrane, turning a simple cleaning job into a major repair.
- It will absolutely blast away the self-leveling lap sealant around your vents and seams.
- It can force water into tiny crevices, creating hidden leaks that lead to devastating (and expensive) water damage down the road.
Stick with a standard garden hose, a good spray nozzle, and a soft-bristle brush. It’s all you need for a safe and effective clean.
What Causes the Black Streaks Down My RV Sides?
Those annoying black streaks are a direct result of a dirty roof. It’s that simple. When it rains or when morning dew settles, the water collects all the dirt, pollen, and oxidized particles from the roofing material (this is especially common with older EPDM roofs).
That grimy water then streams down the sides of your rig, leaving that ugly trail behind. The most effective way to prevent them is by keeping your roof clean and consistently treated with a quality UV protectant. For streaks that are already there, you’ll need a dedicated black streak remover product and some elbow grease to get your sidewalls looking new again. To make short work of existing streaks, you can search for RV black streak removers.
Think of black streaks not as a siding problem, but as a symptom of a roof that needs attention. A clean roof is the ultimate prevention.
When Should I Call a Professional for My Roof?
Routine cleaning is a perfectly manageable DIY job for most RV owners. However, it’s crucial to know your limits and recognize when it’s time to call for backup. Don’t let pride lead to a bigger problem.
You should hire a professional if your inspection reveals any of the following:
- Soft or Spongy Spots: This is a major red flag. It almost always means the wood substrate underneath the membrane is rotted from water damage.
- Large Tears or Punctures: A significant gash in the membrane needs a professional patch or even a replacement to ensure a permanent, watertight seal.
- Widespread Sealant Failure: If the sealant around multiple vents and fixtures is cracked, peeling, and failing, a pro can properly remove all of it and reseal the entire roof correctly.
Finally, if you are not physically able or just don’t feel comfortable working safely at that height, hiring an expert is always the smartest decision. When weighing professional services against DIY costs, looking at a general Phoenix roof pressure cleaning cost guide can give you some valuable context.
For all the cleaners, sealants, UV protectants, and accessories you need to keep your RV roof in prime condition, trust the experts at RVupgrades.com. Start by searching for RV roof cleaners and sealants, or browse the full selection at https://www.rvupgradestore.com. And when you’re done with the roof, keep the momentum going with a full RV maintenance checklist so your roof, appliances, and running gear all stay on the same preventative schedule.


